VisionOS
随着苹果发布了其第一款头显Apple Vision Pro,visionOS也第一次出现在开发者面前。visionOS定义了许多全新的空间计算概念来帮助开发者搭建全新的沉浸式app,与此同时,visionOS可以无缝衔接除Swift、SwiftUI、RealityKit以及ARKit,如果你已对这些苹果的高级框架有足够的了解,那么就可以更快地适应visionOS开发。

软硬件条件:
开发visionOS需要有一个Mac,但是Apple silicon。并且Xcode升级到15.0以上。
Shared Space
通过vision pro的透视技术(passthrough),我们可以看到Shared Space,当系统启动后我们能看到所有的app都出现在这里,我们对于所有app的交互都会在shared Space中进行。
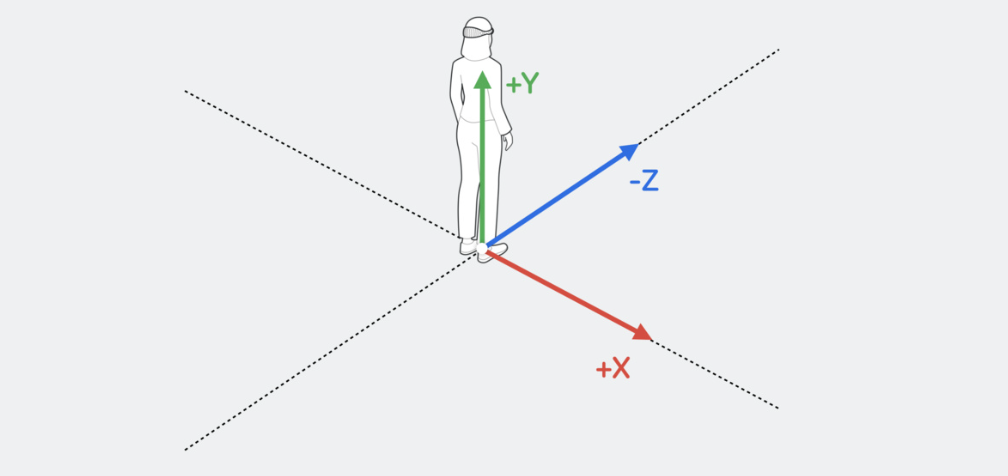
Scene
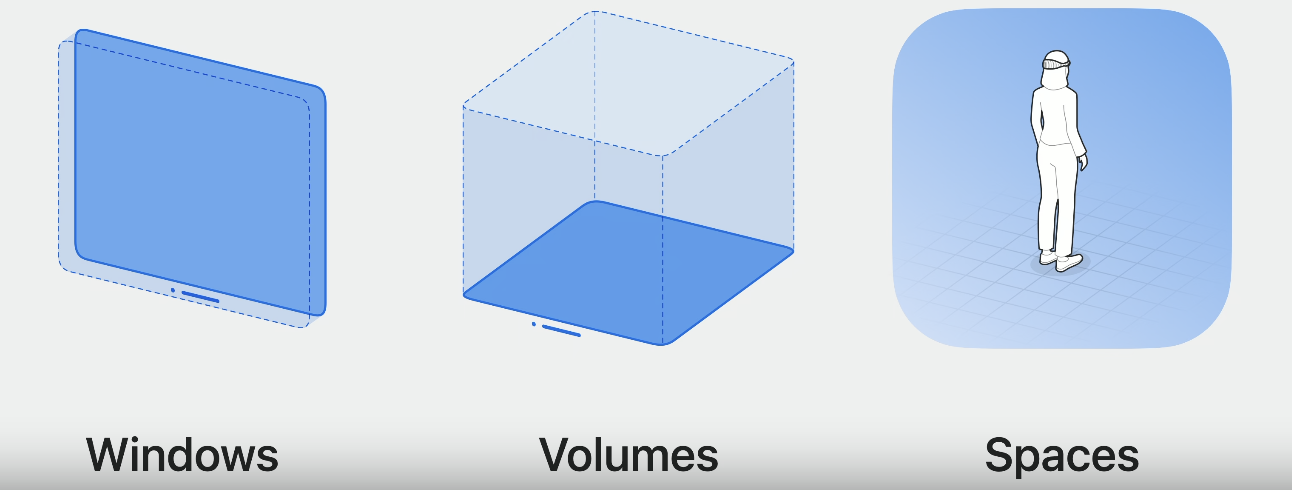
在构建visionOS app时主要涉及到3个场景:Window、Volume以及Space。
Window
window是最基础的场景,和iOS中的window类似,是一个二维平面,但是可以展示在三维空间中,我们可以通过手势拖动window到想要的位置。
Volume
volume顾名思义是一个三维空间,它允许我们展示3d模型,这些3d模型可以来自RealityKit或者Unity。
Full Space
在Full Space场景下,只有你的app的界面可以出现在Shared Space当中。Full Space提供了更强的沉浸式体验,比如当你看电影时,更强的沉浸式空间应该是整个空间变暗(dimming),或者在模拟观测宇宙空间时,你的四周变成暗黑的星空。
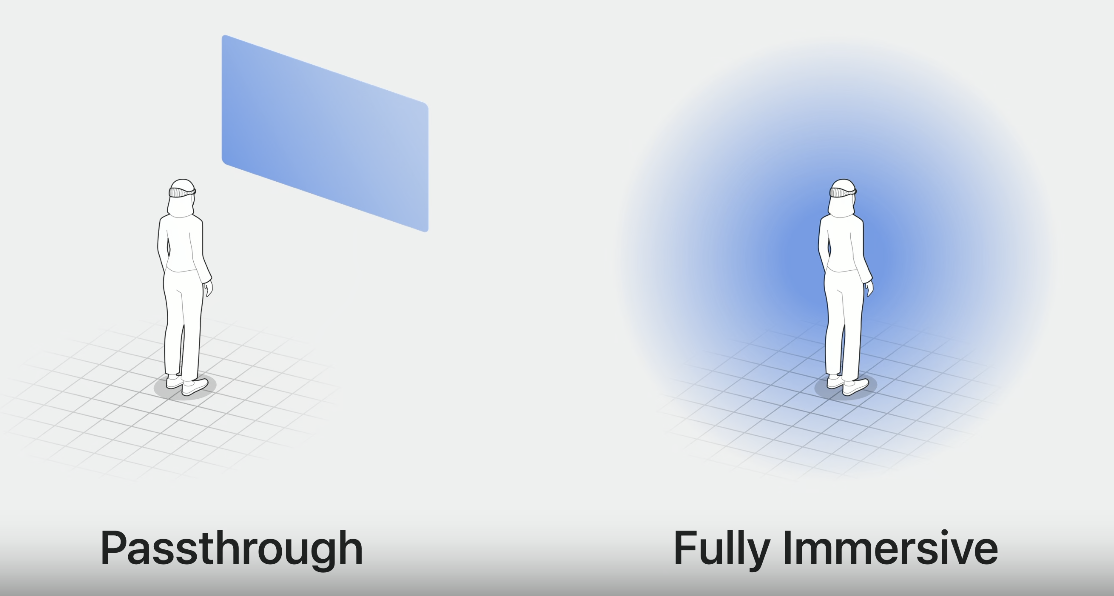
在SwiftUI中支持3种沉浸式空间模式:mixed、progressive以及full。mixed模式强调与Shared Space的真实场景融合展示;progressive我把他理解为半沉浸式,也就是你面前180℃的范围完全沉浸,你的背面仍然是真实场景;full则是完全沉浸。
Interactions
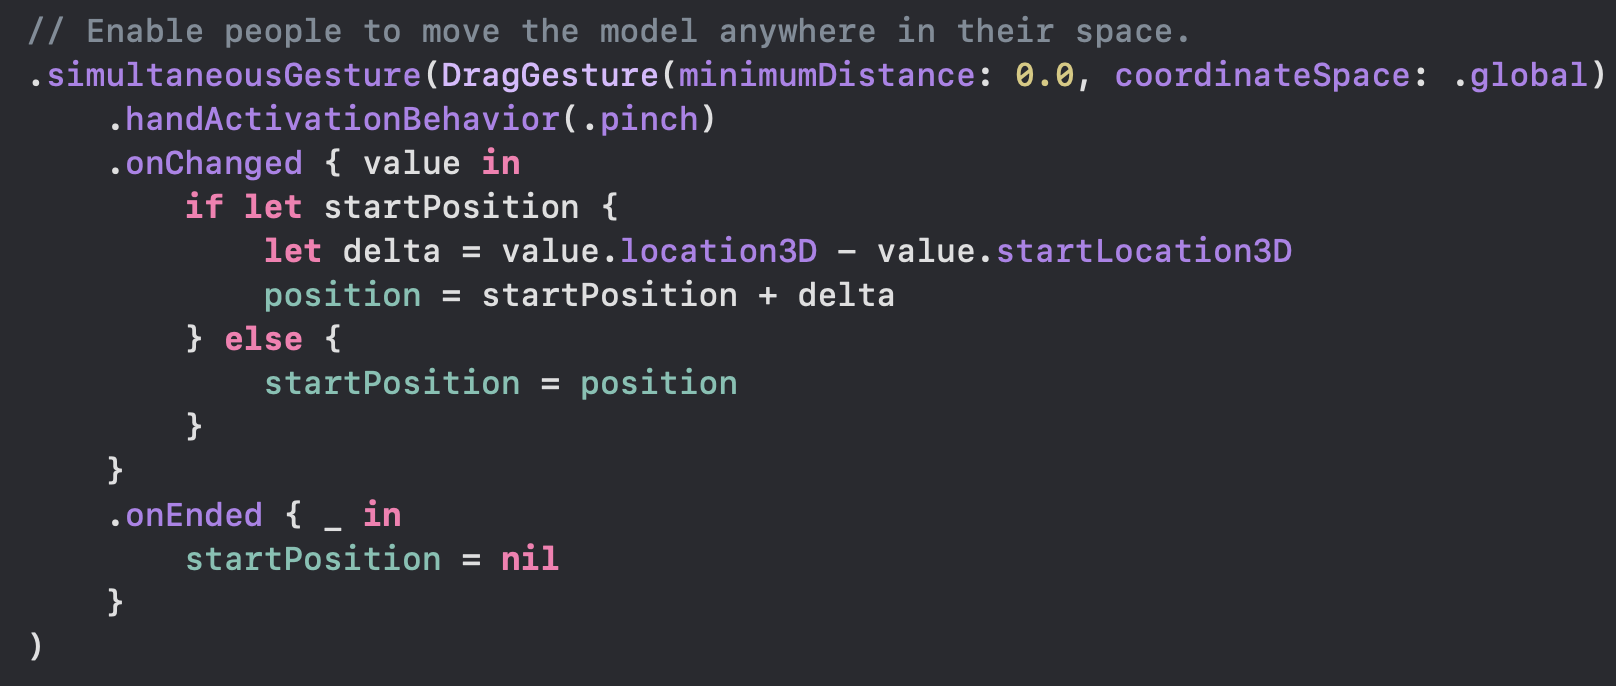
引入了新的交互方式,2个手指tapping在一起是选择,基本的比如pinch, drag, zoom, 和 rotate等。SwiftUI对这些手势基本都支持,如果需要自定义手势需要使用到ARKit。

I think代码方面主要难点在于操作3维坐标。(实例为添加拖拽手势,看着也还行)
SwiftUI进阶概念(一笔带过)
@propertyWrapper
Property Wrapper 是对属性的一层封装,隐藏与属性相关的逻辑细节,提高代码的复用性。必须包含wrappedValue和可选包含projectedValue($传递)。充分理解属性属性包装器可以更好地理解@State、@Binding等关键字。
@ViewBuilder
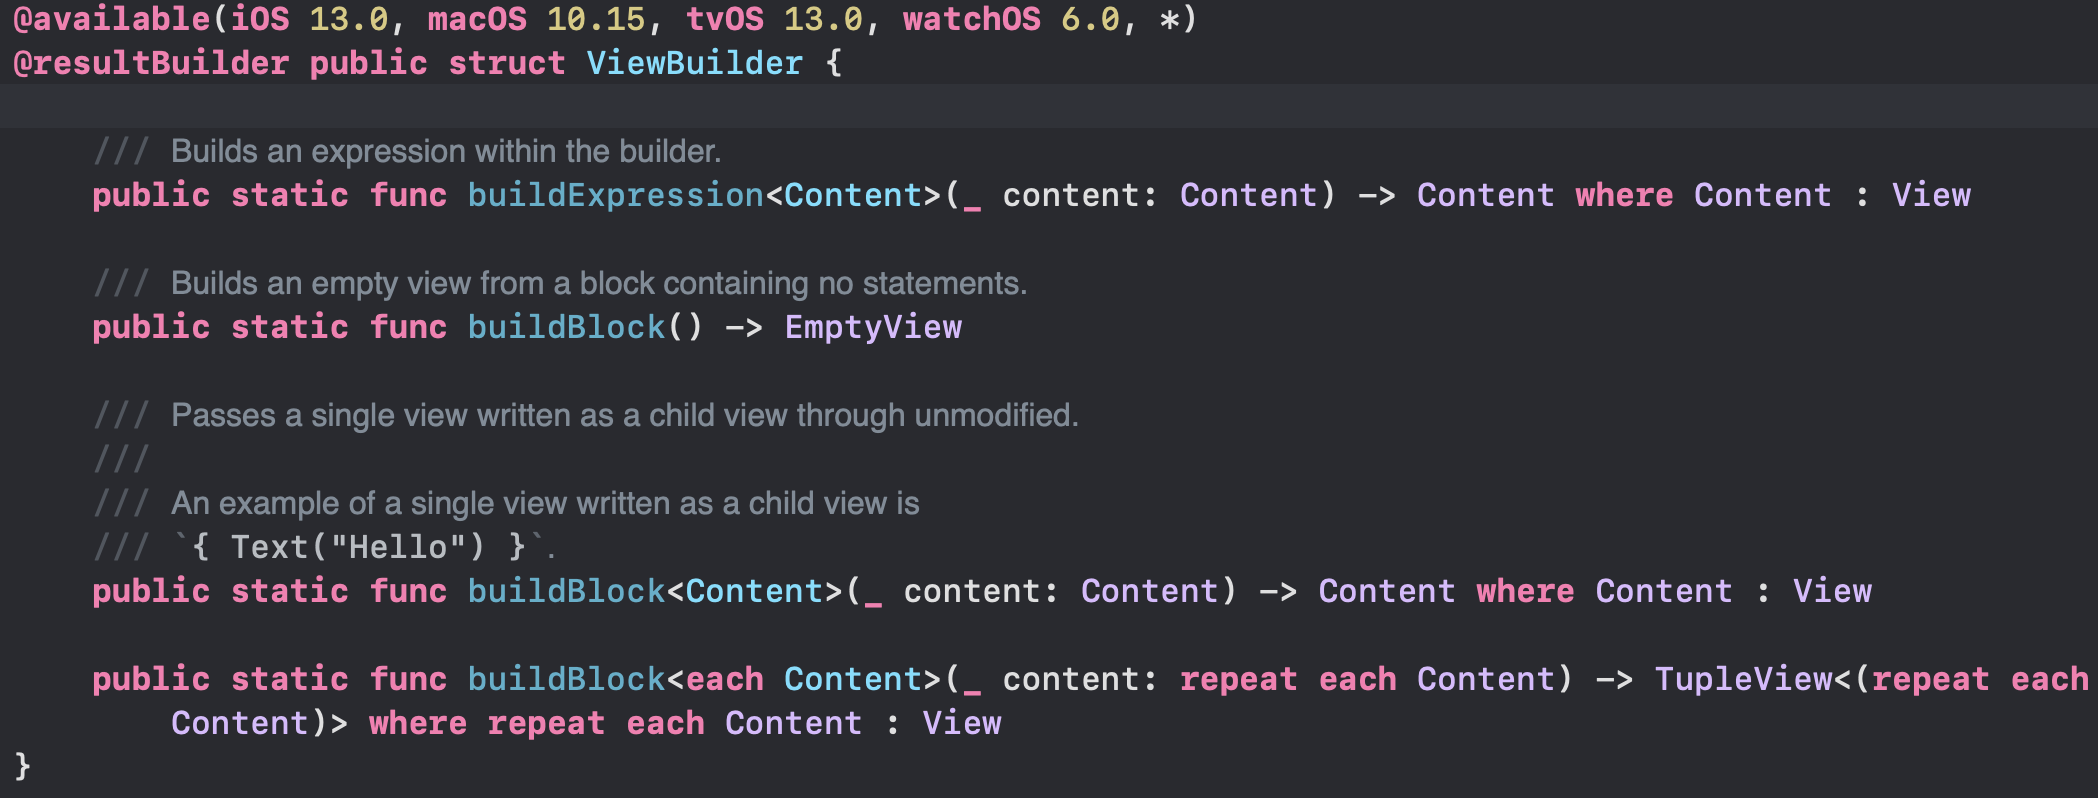
ViewBuilder本质是ResultBuilder, resultBuilder应用在class, structure, enumeration中,可以使用自然的声明式的语言构建你的数据结构。
ViewBuilder是swiftUI的核心
ViewModifier
属性修饰器,需要实现ViewModifier协议
1
2
3
4
5
6
7
8
9
10
11
12
13
14
struct textModifier : ViewModifier {
        func body(content: Content) -> some View {
            HStack{
                Text("1111")
                content
                    .foregroundColor(.brown)
                    .font(.system(size: 20,weight: .medium,design: .serif))
                Text("2222")
            }
        }
    }

    Text("Hello, world! \(data.name)")
                .modifier(textModifier())
GeometryReader
- 获取自身大小和坐标,也可以得到在屏幕中的大小和坐标,调整自身的行为,默认会自动填满父视图
- proxy.frame(in: .global) 获取在屏幕中的坐标
- proxy.frame(in: .local) 自己参考系的坐标
- 可以通过GeometryReader实现按比例分配size,使用proxy.size可以获取其容器的size
- 一般较为复杂的布局最外层会套一个GeometryReader
@Environment
1
2
3
4
5
6
7
8
//环境变量的注入
WindowGroup(id: Module.globe.name) {
            Globe()
                .environment(model)
        }

//环境变量的获取
 @Environment(ViewModel.self) private var model
async-awaits
异步声明代替闭包,实现结构化并发
1
2
3
4
5
6
7
8
9
10
11
12
13
14
15
16
old:
func fetchImages(completion: (Result<[UIImage], Error>) -> Void) {
    // .. 执行数据请求
}

new:
func fetchImages() async throws -> [UIImage] {
    // ..  执行数据请求
}
invoke:
do {
    let images = try await fetchImages()
    print("Fetched \(images.count) images.")
} catch {
    print("Fetching images failed with error \(error)")
}
Demo Time
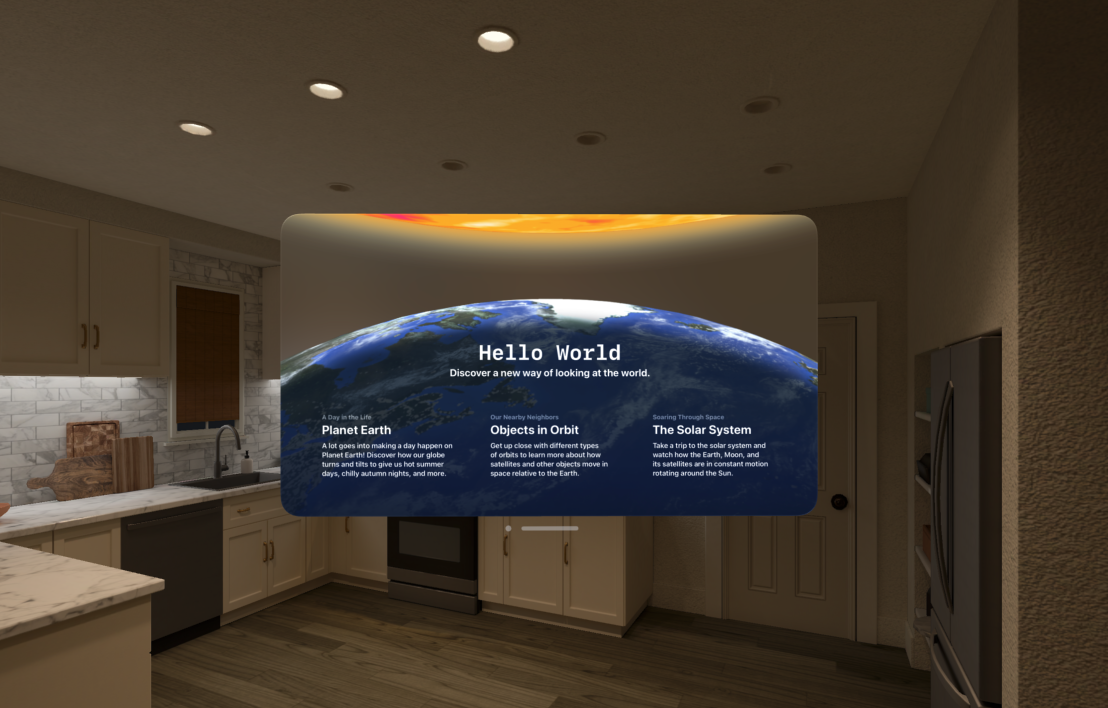
使用官方提供的《hello world》app进行分析。
创建新工程
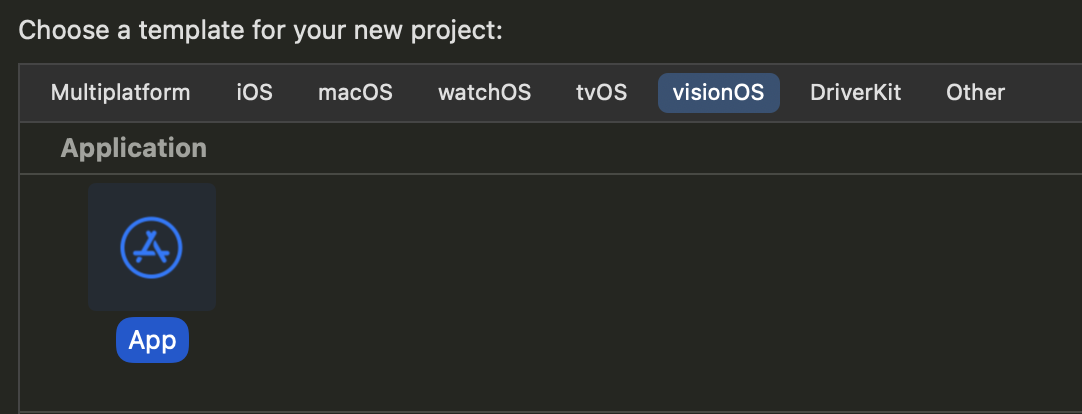
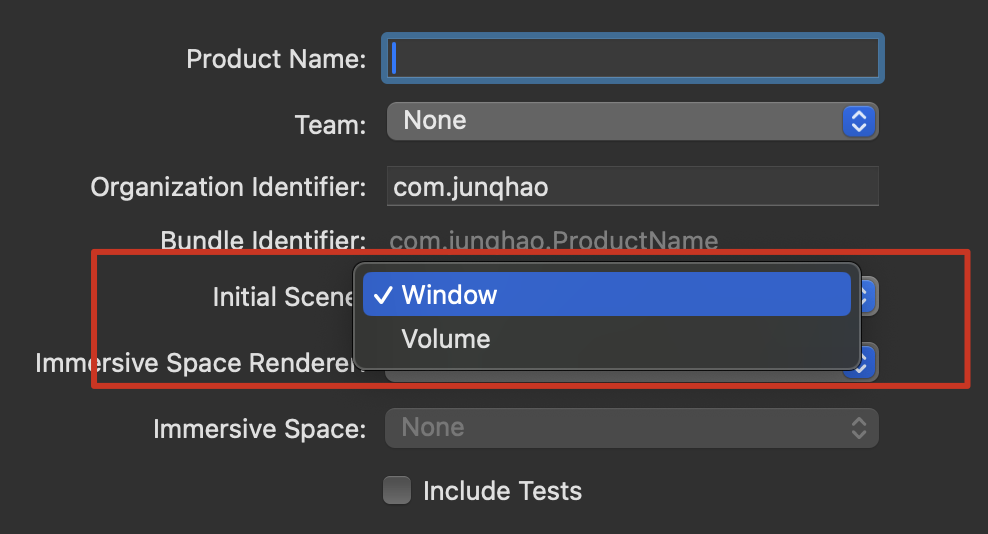
新建项目的模板中选择visionOS app。Initial Scene 是入口场景,可以设置为window或者volume,这里有一个坑就是当你需要在未来修改入口场景时,直接在入口函数里修改是不行的(直接崩溃),需要到info.plist中同步修改Preferred Default Scene Session Role。

函数入口
创建Scene, 主要用到WindowGroup和ImmersiveSpace。在body中允许创建多个scene,系统默认选择第一个Scene作为入口的场景。一般使用windowGroup作为第一个Scene,并且windowStyle要和上面提到的plist中的值对应,否则无法正确加载场景。
1
2
3
4
5
6
7
8
9
10
11
12
13
14
15
16
var body: some Scene {
        // The main window that presents the app's modules.
        WindowGroup("Hello World", id: "modules") {
            Modules()
                .environment(model)
        }
        .windowStyle(.plain)

        // An immersive space that places the Earth with some of its satellites
        // in your surroundings.
        ImmersiveSpace(id: Module.orbit.name) {
            Orbit()
                .environment(model)
        }
        .immersionStyle(selection: $orbitImmersionStyle, in: .mixed,.progressive)
}
善用枚举
Swift的枚举十分强大,要学会灵活运用, 比如这里定义了3个功能模块,同时这些模块用到的数据也一同定义到了枚举里面。
1
2
3
4
5
6
7
8
9
10
11
12
13
14
15
16
17
18
19
20
21
22
23
24
25
26
27
28
29
enum Module: String, Identifiable, CaseIterable, Equatable {
    case globe, orbit, solar
    var id: Self { self }
    var name: String { rawValue.capitalized }

    var eyebrow: String {
        switch self {
        case .globe:
            "A Day in the Life"
        case .orbit:
            "Our Nearby Neighbors"
        case .solar:
            "Soaring Through Space"
        }
    }

    var heading: String {
        switch self {
        case .globe:
            "Planet Earth"
        case .orbit:
            "Objects in Orbit"
        case .solar:
            "The Solar System"
        }
    }
....
.....
}
定义全局ViewModel用于状态存储和传递
1
2
3
4
5
6
7
8
9
10
11
12
13
14
15
16
17
@Observable
class ViewModel {

    // MARK: - Navigation
    var navigationPath: [Module] = []
    var titleText: String = ""
    var isTitleFinished: Bool = false
    var finalTitle: String = "Hello World"

    // MARK: - Globe
    var isShowingGlobe: Bool = false
    var globeEarth: EarthEntity.Configuration = .globeEarthDefault
    var isGlobeRotating: Bool = false
    var globeTilt: GlobeTilt = .none
...
...
}
在启动函数的根视图初始化时注入全局viewmodel
1
2
3
4
5
6
WindowGroup("Hello World", id: "modules") {
            Modules()
                .environment(model)
        }
        .windowStyle(.plain)
打开/关闭多个场景
使用环境变量中的openWindow和dismissWindow实现开关其他场景。
1
2
3
4
5
6
7
8
9
10
11
12
13
14
15
16
17
18
19
struct GlobeToggle: View {
    @Environment(ViewModel.self) private var model
    @Environment(\.openWindow) private var openWindow
    @Environment(\.dismissWindow) private var dismissWindow

    var body: some View {
        @Bindable var model = model

        Toggle(Module.globe.callToAction, isOn: $model.isShowingGlobe)
            .onChange(of: model.isShowingGlobe) { _, isShowing in
                if isShowing {
                    openWindow(id: Module.globe.name)
                } else {
                    dismissWindow(id: Module.globe.name)
                }
            }
            .toggleStyle(.button)
    }
}
使用RealityKit加载🌏模型
模型文件位于WorldAssets中,可以使用Reality Composer Pro创建模型导入,这部分后续再研究。
1
2
3
4
guard let earth = await WorldAssets.entity(named: configuration.isCloudy ? "Earth" : "Globe"),
              let pole = await WorldAssets.entity(named: "Pole") else { return }
 self.earth = earth
导入后是一个Entity对象,创建一个RealityView,在闭包中,将entity添加到content中。
1
2
3
4
5
6
7
8
RealityView { content in
            // Create an earth entity with tilt, rotation, a moon, and so on.
            let earthEntity = await EarthEntity(
                configuration: earthConfiguration,
                satelliteConfiguration: satelliteConfiguration,
                moonConfiguration: moonConfiguration)
            content.add(earthEntity)
}
自定义viewmodifier实现对模型的拖拽手势
必须使用targetedToAnyEntity()将手势添加到Entity上,然后就是各种3d坐标转换,这里慢慢理解吧。。
1
2
3
4
5
6
7
8
9
10
11
12
13
14
15
16
17
18
19
20
21
22
23
24
25
26
27
28
29
30
31
32
33
34
35
36
37
38
39
40
41
42
43
44
45
46
47
48
49
50
51
52
53
54
55
56
57
58
59
func body(content: Content) -> some View {
        content
            .rotation3DEffect(.radians(yaw == 0 ? 0.01 : yaw), axis: .y)
            .rotation3DEffect(.radians(pitch == 0 ? 0.01 : pitch), axis: .x)
            .gesture(DragGesture(minimumDistance: 0.0)
                .targetedToAnyEntity()
                .onChanged { value in
                    // Find the current linear displacement.
                    let location3D = value.convert(value.location3D, from: .local, to: .scene)
                    let startLocation3D = value.convert(value.startLocation3D, from: .local, to: .scene)
                    let delta = location3D - startLocation3D

                    // Use an interactive spring animation that becomes
                    // a spring animation when the gesture ends below.
                    withAnimation(.interactiveSpring) {
                        yaw = spin(displacement: Double(delta.x), base: baseYaw, limit: yawLimit)
                        pitch = spin(displacement: Double(delta.y), base: basePitch, limit: pitchLimit)
                    }
                }
                .onEnded { value in
                    // Find the current and predicted final linear displacements.
                    let location3D = value.convert(value.location3D, from: .local, to: .scene)
                    let startLocation3D = value.convert(value.startLocation3D, from: .local, to: .scene)
                    let predictedEndLocation3D = value.convert(value.predictedEndLocation3D, from: .local, to: .scene)
                    let delta = location3D - startLocation3D
                    let predictedDelta = predictedEndLocation3D - location3D

                    // Set the final spin value using a spring animation.
                    withAnimation(.spring) {
                        yaw = finalSpin(
                            displacement: Double(delta.x),
                            predictedDisplacement: Double(predictedDelta.x),
                            base: baseYaw,
                            limit: yawLimit)
                        pitch = finalSpin(
                            displacement: Double(delta.y),
                            predictedDisplacement: Double(predictedDelta.y),
                            base: basePitch,
                            limit: pitchLimit)
                    }

                    // Store the last value for use by the next gesture.
                    baseYaw = yaw
                    basePitch = pitch
                }
            )
            .onChange(of: axRotateClockwise) {
                withAnimation(.spring) {
                    yaw -= (.pi / 6)
                    baseYaw = yaw
                }
            }
            .onChange(of: axRotateCounterClockwise) {
                withAnimation(.spring) {
                    yaw += (.pi / 6)
                    baseYaw = yaw
                }
            }
    }
页面跳转
使用NavigationStack实现导航功能。只要关联了Module类型的数据发生变化会自动触发navigationDestination的闭包,打开新页面。
1
2
3
4
5
6
7
8
9
@Published var navigationPath: [Module] = []

NavigationStack(path: $model.navigationPath) {
                TableOfContents()
                    .navigationDestination(for: Module.self) { module in
                        ModuleDetail(module: module)
                            .navigationTitle(module.eyebrow)
                    }
            }
触发跳转使用NavigationLink
1
2
3
4
5
6
7
8
9
10
11
12
13
14
NavigationLink(value: module) {
            VStack(alignment: .leading, spacing: 4) {
                Text(module.eyebrow)
                    .font(.callout)
                    .bold()
                    .foregroundStyle(.secondary)
                VStack(alignment: .leading, spacing: 10) {
                    Text(module.heading)
                        .font(.largeTitle)
                    Text(module.abstract)
                }
            }
            .padding(.vertical, 30)
        }
部分效果展示
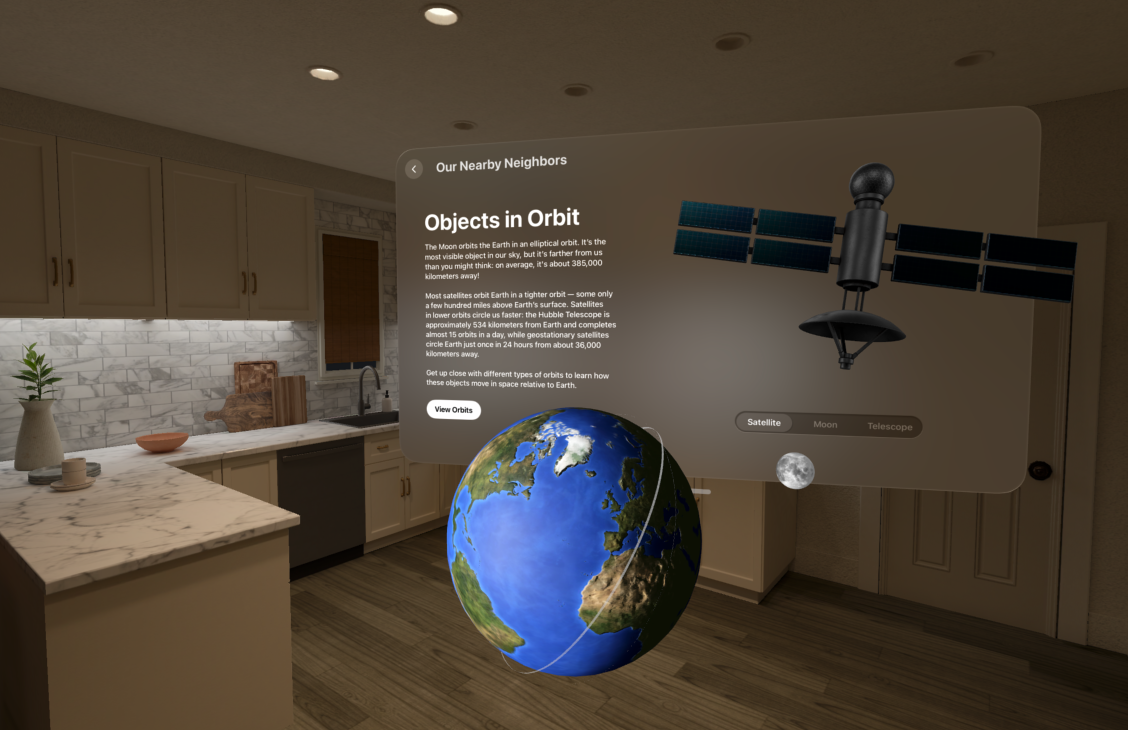
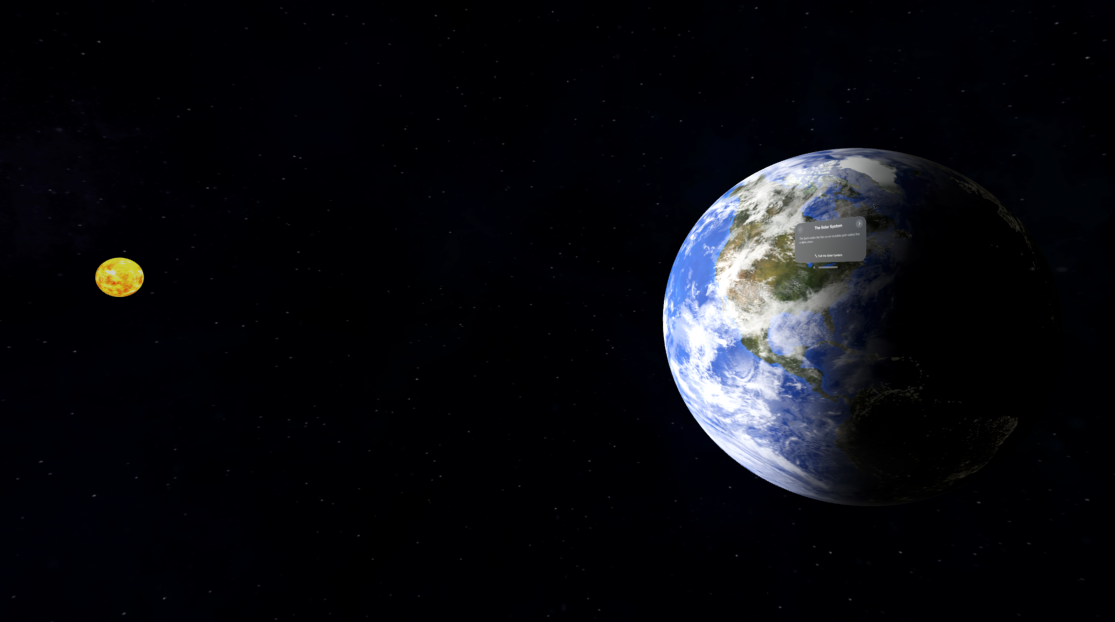
UIKit for VisionOS
不适用的API
许多API没法转化到VisionOS上,相关的代码可以使用以下方式注释掉。
1
2
#if !os(visionOS)
#endif
- UIDeviceOrientation
- UIScreen
- UITabBar(leading 和 trailing不能使用)
- 应该还有很多…
UI适配
UINavigationController和UISplitViewController转化到VisionOS上自带玻璃效果,其他的vc应该尽量保证风格的统一性。
- 为vc设置毛玻璃背景
1
2
3
4
5
class MyViewController: UIViewController {
   override var preferredContainerBackgroundStyle: UIContainerBackgroundStyle {
   return .glass
  }
}
- 为cell设置悬停效果
1
2
3
4
5
6
7
class CollectionViewCell: UICollectionViewCell {
  init(document: PixelArtDocument) {
  self.hoverStyle = .init(
  effect: .highlight,
  shape: .roundedRect(cornerRadius: 8.0))
  }
}
- 通过UIHostingController桥接使用SwiftUI的新特性…
1
2
3
4
5
6
7
8
9
func showEntityPreview() {
    let entityView = PixelArtEntityView(model: entityViewModel)
    let controller = UIHostingController(rootView: entityView)
    addChild(controller)
    view.addSubview(controller.view)
    controller.didMove(toParent: self)
    prepareEditorInteractions()
}
References
Hello World | Apple Developer Documentation
visionOS | Apple Developer Documentation
Learn - visionOS - Apple Developer
Meet SwiftUI for spatial computing - WWDC23 - Videos - Apple Developer
Meet UIKit for spatial computing - WWDC23 - Videos - Apple Developer